Before being able to enable SSL on WebSphere, you
need to have your own certificate. This certificate
can be a self-certificate for testing purpose but in
any production case, you should have a certificate
issued by a Trusted CA. The following steps describe
how to get your own certificate and later how to
configure WebSphere to use it.
Installing a certificate
chain
Before you can add your certificate into the
keystore, you must first include the certificates
chain. You must install the following public
certificates:
| Root (GTE root certificate) |
Root |
| Primary Server certificate
(ComodoSecurityServicesCA certificate) |
PrimServer |
| Server certificate |
Server |
You can add the certificates chain
from the Signer Certificates screen as shown below:
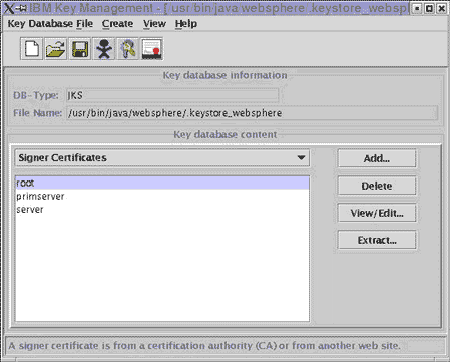
Click on the Add button. A dialog
box will appear where you have to enter the data,
the Certificate file name (the certificate file you
received) and its location. Once all of this
information is entered click on OK.
Installing your site
certificate
You can import it into your keystore. In the IBM
Key Management console, select in the dropdown
the option Personal Certificates as in the following
screen:

Then click on the button Receive.
A dialog box will appear where you have to enter the
data, the Certificate file name (the certificate
file you received) and its location. Once all of
this information is entered click on OK.
Enabling SSL
Once your keystore has been successfully configured
with your certificate, you can now enable SSL in
WebSphere Application Server.
In IBM WebSphere, SSL can be
configured for each component. For more information
on how to enable/configure it for each of them,
please go to the IBM Web site at
http://www-4.ibm.com/software/webservers/appserv/support.html
|